
Often times in life, we don’t get the opportunity to see behind-the-scenes. We are presented with the outcome. The final piece of work. We see nothing but the what, and hear only exaggerated stories about the how.
When working with technology, we often put in a fair amount of focused effort into an activity that for one reason or another, ends up being practically unusable.
This is never not-disappointing.
It is always a little disheartening.
A minor failure. The feeling of time-wasted.
But…
More-closely examined, there are lessons learned from these false starts and little failures.
As many modern sciences and business practices these days would suggest:
Embrace. Failure.
This post was a walkthrough based on my own experience setting up an SSL certificate for a Lightsail-hosted website. I’m a fairly seasoned tech dude. I’ve set up dozens of websites in my time, both personally and professionally. But every time has been a little different.
This particular experience was unique in that it was my first time using AWS Lightsail, so I had not actually completed the activity personally before writing the post.
Still, the work is not work lost. It is experienced gained, and lessons learned.
Lessons Learned / tl;dr
- AWS Lightsail resources are difficult, and in some cases impossible to share with the rest of AWS modules in your default VPC.
- The proper way to obtain an SSL certificate for Lightsail is not through Route 53.
- The proper way is to:
- In Lightsail, create a Load Balancer (this will cost you another ~$20/mo)
- Obtain an SSL certificate through Lightsail on the LB
- There are super cool WordPress plugins for automatic SSL setup. This is far easier than editing your wp-config file manually.
Disclaimer: This is NOT the way to set up the SSL certificate for AWS Lightsail!
Just to repeat: This post is for notes and lessons-learned.
Enjoy!
How to set up SSL for a Website hosted on AWS Lightsail but DNS registered with GoDaddy
I use GoDaddy for all of my domain registration activities.
I use GoDaddy simply because it’s what I’ve always done. As of the time of this writing, I am indifferent as to whether it’s good or bad. I’ll likely transfer a few of my domains over to Route53 at some point–but I want a full understanding of what that entails before I pull the trigger. For now, GoDaddy does everything I need.
For this reason, I’m in a situation where I want a SSL certificate on a site that is hosted using AWS Lightsail (Amazon’s simple hosting solution which creates EC2 instances and relevant resources for you, out of the box) but with a DNS managed by GoDaddy. GoDaddy is simply set up to point to AWS Lightsail’s Nameservers.
What is SSL?
SSL is an acronym that stands for Secure Sockets Layer. I prefer not to get too deep in to it. Essentially the two things you need to know are 1. it’s pretty much required for a working website 2. and it’s for security.
What is an SSL certificate?
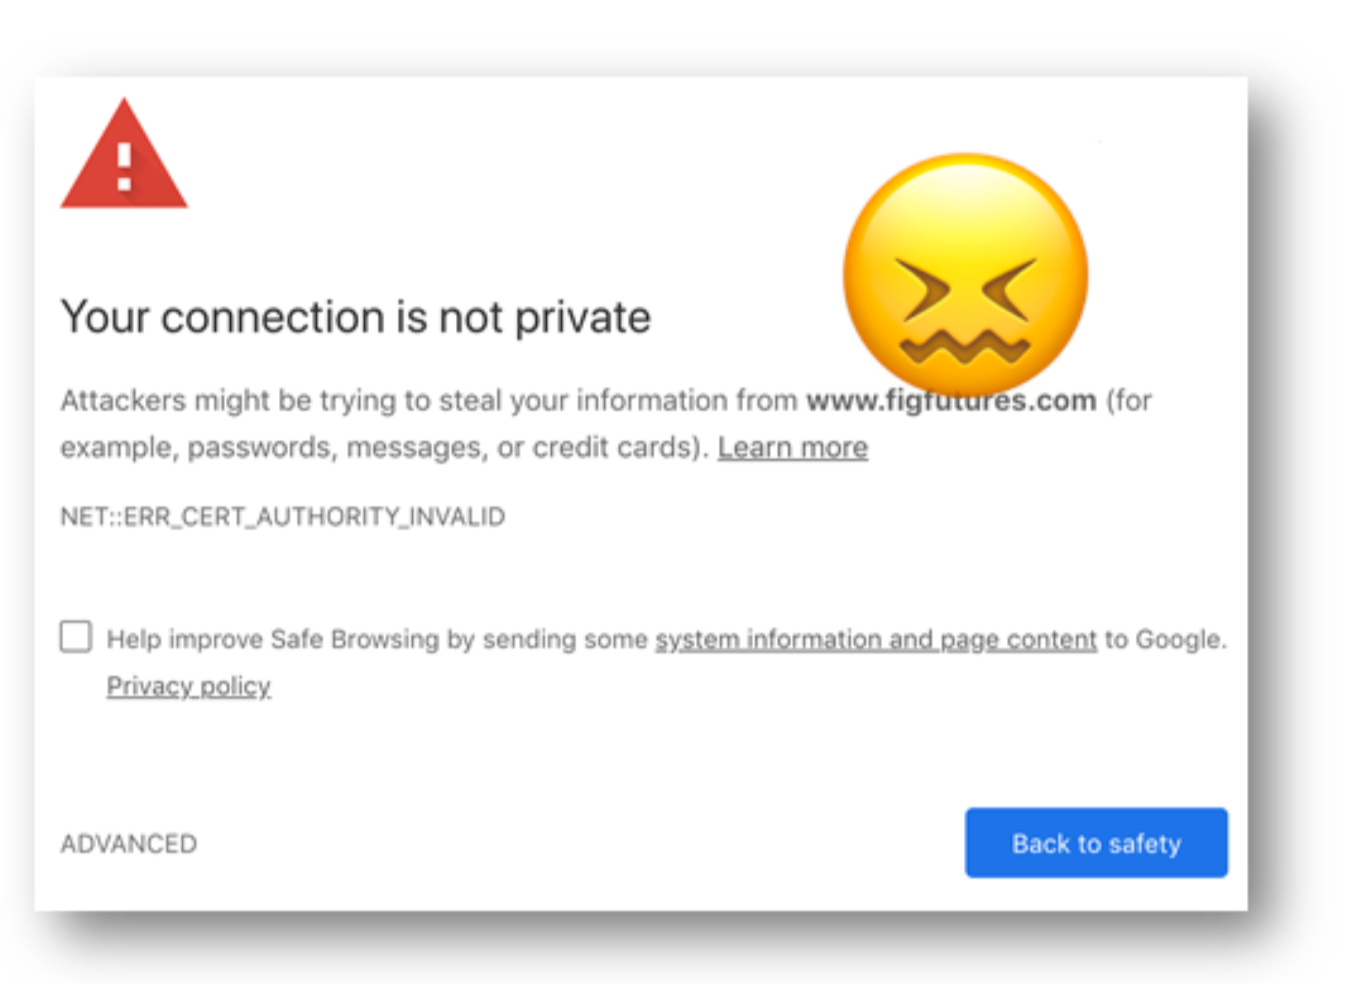
Ever see this message in your browser’s address bar?


“Not Secure”
(Hint: There’s a hidden “http://” in that address bar that for some reason the Google Chrome folks decided to stop showing)

“Your connection is not private” Your connection is not private Attackers might be trying to steal your information from www.figfutures.com (for example, passwords, messages, or credit cards). Learn more NET::ERR_CERT_AUTHORITY_INVALID
The reason you see these messages, is because effective July 2018, Google has made the decision to mark any non-HTTPS sites as “insecure”. Non-HTTPS sites do not have a valid SSL certificate set up.
From Google:
What is HTTPS?
HTTPS (Hypertext Transfer Protocol Secure) is an internet communication protocol that protects the integrity and confidentiality of data between the user’s computer and the site. Users expect a secure and private online experience when using a website. We encourage you to adopt HTTPS in order to protect your users’ connections to your website, regardless of the content on the site.
So how do you get a valid SSL certificate set up for a new website?
I’ll be doing this using AWS, because my site is hosted using Lightsail, with Route53 and GoDaddy.
- In the AWS Console, under “Security, Identity & Compliance”, go to “Certificate Manager”
- If it’s the first time you browse here, you’ll see the splash screen with two options. Choose the “Provision Certificates” option.
- Request a Public Certificate
- Type in the name of your domain

Note: type an asterix (*) in the subdomain part of your domain. Example *.figfutures.com
- Select the DNS validation method
- “Confirm and Request”
- If you are using Route53, you’ll see a button for “Create record in Route 53. This means that AWS Certificate Manager will add record to your DNS for you!
That was easy!
Because we’re doing this all in Route 53 (remember GoDaddy is pointing to AWS’s Nameservers) all of the configuration is handled automatically.
You will need to wait ~30 minutes for the changes to propagate. But after that, in the Certificate Manager console, you should see confirmation that your certificate is in place.

Sweet!
Next, we need to set up WordPress to use this certificate
The best way to do this is by using the Really Simple SSL WordPress Plugin by Rogier Lankhorst, Mark Wolters.
We’ll need to download the plugin, and install it by uploading it to your WordPress server’s wp-content/plugins directory.
Because I’ve not set up FTP on my Lightsail instance (and I’m not even sure yet whether that’s possible), I’m going to opt to do this via SSH.
I’ll write how-to post a later time on how to SSH into a remote machine. If the steps below are confusing, for now, check out this post.
Install the Really Simple SSL WordPress Plugin
- Download the Really Simple SSL zip file from here and unzip it.
- Copy the /really-simple-ssl folder from your local machine to your server’s /wp-content folder. My AWS Lightsail Bitnami wp-content folder is located at /opt/bitnami/apps/wordpress/htdocs/wp-content
- On Windows, I’m using a Windows tool called WinSCP instead of the command line. It’s a drag and drop interface, similar to FileZilla. Simplicity. No ego.
- Make sure your wp-config.php file is writeable. To do this, run the “chown daemon:daemon” command on the file, found in /opt/bitnami/apps/wordpress/htdocs/:
chown daemon:daemon /opt/bitnami/apps/wordpress/htdocs/wp-config.php - Back in my WordPress dashboard, in the Plugins section, go to “Installed Plugins”. You should now see “Really Simple SSL” in the list. Activate the plugin!
- Something’s wrong…I’m still getting a “not secure message”. I’ll need to come back to this another time.